Showing posts with label camera modes. Show all posts

Monday, 28 September 2020

Learn how to photograph fireworks

How to Photograph Fireworks


Taking photographs of fireworks can be really easy, just follow the below steps and have fun taking photographs.


1)      Wear something warm

2)      Get the best spot – always worth asking the organisers where the firework display will be and inform them that you are taking some photographs of fireworks. Generally most organisers are very helpful!!

3)      Use a tripod, as the shutter speed is going to be very slow, tripod will avoid any camera shake.

4)      Focal Length – when photographing fireworks it’s difficult to see what will be in the frame (camera’s view finder) always shoot on wide angle. By zooming into the fireworks, some of the display will be lost, but do try zooming in as you will be surprised what you have captured.

5)      Do not use flash – switch off the flash as this will not capture the firework display.

6)      Camera Settings DSLR:

 I photographed my firework display on fully manual mode with camera on the tripod and these were my camera settings: Aperture f16 (to get maximum depth of field), Shutter speed 30 Sec, ISO set at 200. Use these settings as a guide and change them accordingly to your final result.

If unsure with the Manual Mode on your cameras, use ‘Aperture Mode’ (A) set the aperture at f11 of f16, the camera will set the shutter speed accordingly.

You can also use the ‘Shutter Mode’ (TV or S) set the shutter speed at 20 seconds. Use this as a guide, you may need more or less time – check your result.

7)      Camera Settings Compact Cameras:

Most compact cameras nowadays have preset ‘Firework’ mode, set the camera on this mode and the camera will set everything accordingly.

Have fun taking photographs of fireworks!!


Bhupinder Ghatahora ABIPP, ARPS, ASWPP
Ghatahora Photography
info@ghatahora.co.uk
Facebook

Monday, 22 July 2019

Understand Your Camera Modes

In this article I will briefly explain the common camera modes associated with ‘Point & Shoot’ cameras and DSLRs. You may be aware that compact cameras have various pre-set modes (often known as ‘scenes’) and you may have wondered what these modes are use for.

The three most common modes which are often available on most advanced cameras are, Programme (fully automatic), Manual and Semi-Automatic modes (Shutter and Aperture control). Recent digital compact camera include these modes and several other scene selection modes, which are specifically designed for the subject being photographed, such as fireworks, beach, snow, parties, nightlife, etc.

The function of these modes is to create accurate and correctly exposed images. These modes are useful shortcuts for the novice photographer who may lack the full understanding on how to use Manual and Semi-Automatic modes. When a ‘scene’ mode is selected, the camera adjusts the aperture, shutter speed and ISO to calculate the right exposure. Selecting ‘scene’ mode often limits the user from making adjustments to the flash, white balance, ISO and other criteria as the camera adjusts these according to the subject.

When the correct ‘scene’ mode is selected to fit the subject being photographed, the results are often to acceptable standards, giving a balanced photograph.

Advanced photographers often use the Manual or Semi-Automatic modes because they provide better control on the final image. The photographer would envisage the image he or she would like to be created, and then adjust the camera settings accordingly.

Below is a brief summary of some of the common camera modes and examples of images taken using these modes.
(All the following photographs have been taken using a DSLR, but the same theory can be applied to any 'Point & Shoot' cameras.)

The flower symbol stands for Close-up or Macro which means taking photographs of subjects really close. Use this mode to photograph close-ups of flowers, jewellery, insects, dew drops, abstract patterns, etc. In this mode the built-in flash may be disabled to prevent an overexposed image, as your camera is really close to the subject.


The person & star symbol stands for Night Portrait or Night Photography. This mode uses a combination of flash and long exposure to pick the ambient (available) light in the background. Use this mode to take pictures of persons in low-light conditions. The use of a tripod is often recommended.


The face symbol stands for Portrait mode. The camera selects the widest aperture setting
to minimise depth-of-field in order to blur the background. Always remember to focus on your subject’s eyes for sharper portraits. In this setting, the flash will automatically activate the ‘red-eye’ reduction setting.


The mountain & cloud symbol stands for Landscape mode. Using this mode your camera will select the smallest aperture to maximise depth-of-field. Your image will be sharp both in the foreground and in the background. As the name suggests, use this mode to take landscape photographs.


The running person symbol stands for Sports mode, which is all about speed. Your camera will automatically choose the fastest shutter speed to capture the fast moving subject. In some cameras, the camera will enable continuous high-speed shooting; which means it will take photographs one after another continually. Use this mode to capture fast moving subjects or any kind of sport.


The 'A' symbol stands for Aperture mode (semi-automatic). In this mode you select your desired aperture and the camera will set the shutter speed to match the aperture settings. For example, if you change your aperture from f5.6 to f11, the camera will adjust the shutter speed automatically keeping the exposure the same. Use this mode to have more control on the depth-of -field.


The 'TV' or 'S' symbol stands for Shutter mode (semi-automatic). In this mode you select the shutter speed, and the camera will set the aperture accordingly. For example, if you change the shutter speed from 1/30 (slow) to 1/250 (fast) of a second, the aperture will change automatically. This will leave the exposure the same as the camera is matching your shutter settings. The shutter mode is used to capture movement or create a blur. I use shutter mode to photograph movement in water, trailing traffic lights or to freeze the action.


The 'M' symbol stands for Manual mode (fully manual). In this mode you have full control of your camera. You decide what aperture and shutter speed to use in order take a correctly exposed image. In this mode you can also override any of the camera settings, i.e. flash, ISO, exposure compensation and white balance. Choose this mode if you are fully confident about how the aperture and shutter work together to produce a correctly exposed image. I use this mode mostly for landscape, close-up portraits, snow and night photography, and even just experimenting with different exposures.


I hope this brief insight into camera mode assists you in taking better photographs.

Bhupinder Ghatahora
Ghatahora Photography
info@ghatahora.co.uk
Facebook


Friday, 9 March 2018

Friday's Tip

Tip 7:

Use faster shutter speed to freeze movement, i.e. sports photography, water droplets, cars.

Bhupinder Ghatahora
Ghatahora Photography
info@ghatahora.co.uk
www.ghatahora.co.uk
@Ghatahora
Facebook
Pinterest
Flickr
Instagram


Monday, 3 July 2017

Simple steps to take great High Street Photographs

Taking photographs of the High Street is one of my favourite subjects, simply because its fun and easy to capture the mood.

Here are a few points to keep in mind when taking the photographs:

  1. The right camera settings on both SLRs and Compact Cameras
  2. If allowed, use a tripod. Keep in mind that many places will not allow the use of tripods.
  3. Plan where to take the High Street photographs.
  4. Time - is it a day time shot, or a night shot. 
  5. Think about composition, how to include people in the photograph, leading lines, colour, close-ups etc.
  6. Exposure - if taking photographs at night, it's always best to over and under expose the shot by 0.3. (use this as a guide only, adjust according to your image) Every camera will have a '-+' symbol.
  7. Final finished image — before I take any photographs, I always think about how I want the final finished image to look. If it's going to be in colour, sepia, b/w or do I need to add noise/gain in the final image to create the mood and atmosphere.
Settings for Compact Cameras

Day-Time
Use 'Landscape' Mode (it will give you the maximum depth of field)

Night-Time
Use 'Sunset', 'Fireworks', 'Night' Modes (every camera is different, please check your camera manual to see which mode gives a slow shutter speed. Use these as a guidance only)

Set SLR cameras on either Aperture Mode or Shutter Mode.

Here are some photographs of High Street Photography

1. Photograph the High Street at light to capture movement and lights.


2. Photograph people on the High Street to capture mood and emotions, choose wide angle to shoot the whole high street.


3. Photograph interesting shop signs
This photograph was taken in Leicester

Shop sign


4. Photograph buildings
Building on the High Street


5. Photograph interesting structures on the High Street


6. Photograph events happening on the High Street.  Olympic torch relay - Basingstoke 2012 (below image was taken with a compact camera)


7. Move closer to your subject and focus on the detail, either on shop windows, signs or shadows


Hope this articles assists you in taking better and interesting photographs of the High Street. A High Street could be anywhere!

Bhupinder Ghatahora
Ghatahora Photography
info@ghatahora.co.uk
Facebook

Friday, 24 March 2017

And finally 'M' is for manual on your camera

The 'M' symbol stands for Manual mode (fully manual). In this mode you have full control of your camera. You decide what aperture and shutter speed to use in order take a correctly exposed image. In this mode you can also override any of the camera settings, i.e. flash, ISO, exposure compensation and white balance.

Choose this mode if you are fully confident about how the aperture and shutter work together to produce a correctly exposed image. I use this mode mostly for landscape, close-up portraits, snow and night photography, and even just experimenting with different exposures.

Manual mode:


Bhupinder Ghatahora
Ghatahora Photography

Friday, 17 March 2017

What does 'TV' or 'S' stand for on your camera

The 'TV' or 'S' symbol stands for Shutter mode (semi-automatic). In this mode you select the shutter speed, and the camera will set the aperture accordingly.

For example, if you change the shutter speed from 1/30 (slow) to 1/250 (fast) of a second, the aperture will change automatically. This will leave the exposure the same as the camera is matching your shutter settings.

The shutter mode is used to capture movement or create a blur. I use shutter mode to photograph movement in water, trailing traffic lights or to freeze the action.

Freezing action, shutter speed 1/125 sec


Creating a blur/movement, shutter speed 1/2 sec


Bhupinder Ghatahora
Ghatahora Photography

Friday, 10 March 2017

What is 'A' on your camera

The 'A' symbol stands for Aperture mode (semi-automatic). In this mode you select your desired aperture and the camera will set the shutter speed to match the aperture settings.

For example, if you change your aperture from f5.6 to f11, the camera will adjust the shutter speed automatically keeping the exposure the same. Use this mode to have more control on the depth-of -field.

Flower photographed at f3.2

Tulips photographed at f8


Bhupinder Ghatahora
Ghatahora Photography

Friday, 3 March 2017

What does the 'running person' symbol stand for on your camera

The running person symbol stands for Sports mode, which is all about speed. Your camera will automatically choose the fastest shutter speed to capture the fast moving subject.

In some cameras, the camera will enable continuous high-speed shooting; which means it will take photographs one after another continually. Use this mode to capture fast moving subjects or any kind of sport.


Bhupinder Ghatahora
Ghatahora Photography

Friday, 24 February 2017

What is the 'mountain & cloud' symbol on your camera

The mountain & cloud symbol stands for Landscape mode. Using this mode your camera will select the smallest aperture to maximise depth-of-field.

Your image will be sharp both in the foreground and in the background. As the name suggests, use this mode to take landscape photographs.

Sea view

Bhupinder Ghatahora
Ghatahora Photography

Friday, 17 February 2017

The face symbol on your camera

The face symbol stands for Portrait mode. The camera selects the widest aperture setting
to minimise depth-of-field in order to blur the background.

Always remember to focus on your subject’s eyes for sharper portraits. In this setting, the flash will automatically activate the ‘red-eye’ reduction setting.

Colourful hair

Bhupinder Ghatahora
Ghatahora Photography

Friday, 10 February 2017

What does the 'person & star symbol' stand for on your camera

The person & star symbol stands for Night Portrait or Night Photography. This mode uses a combination of flash and long exposure to pick the ambient (available) light in the background.

Use this mode to take pictures of people in low-light conditions. The use of a tripod is often recommended.

On the bridge

Bhupinder Ghatahora
Ghatahora Photography

Friday, 3 February 2017

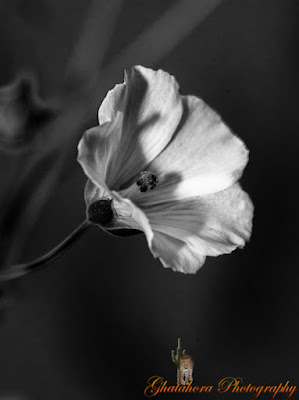
The flower symbol on your camera


The flower symbol stands for Close-up or Macro which means taking photographs of subjects really close. Use this mode to photograph close-ups of flowers, jewellery, insects, dew drops, abstract patterns, etc. In this mode the built-in flash may be disabled to prevent an overexposed image, as your camera is really close to the subject.


Close-up of flower
Bhupinder Ghatahora
Ghatahora Photography

Thursday, 20 October 2016

Capture the Autumn Colours

Autumn is one of my favourite seasons for photography as it’s filled with cool nights, misty mornings, golden lighting, dew drops on spider webs, reflections of autumn colours in the water, long shadows and fallen leaves which all create a great atmosphere. But most importantly, the striking colours in the environment.

The main advantage of living around trees, parks and woodland areas, is that you don’t have to travel far to capture the autumn colours. Most of the woodland locations are easily accessed by public footpaths. Local parks provide plenty of opportunities for close-up nature photography.

The colours at the beginning of autumn can be disappointing, it is advisable to wait till they are rich and vibrant, which is usually at the end of October till end of November. However, keep an eye on your surroundings and keep your gear and equipment ready to capture the best lighting.

Here are a few tips to keep in mind when taking autumn photographs:

Camera settings:

SLR: To photograph Landscapes, set the camera on Aperture Mode at f11 or f16, the camera will adjust the shutter speed accordingly. For Close-up Nature photography, use an aperture of f4 or f5.6. The use of a tripod is recommended as exposures will be long.

Compact Camera: Set the camera on Landscape Mode. For close-ups use mode. These modes are also available on SLRs.

I took the below photograph using my compact camera. The photograph has been changed to sepia using an editing software. Many compact cameras have an inbuilt facility which allows you to change the tone of your image. (This can be found in the menu settings of your camera). I always take two photographs of the same scene, one in colour and other in b/w or sepia. 


Framing:

Trees make dominant focal points and create the finest displays, use ‘rule of third’ to frame the scene.


Catch the light:

The warm light at early morning or evening is perfect to capture some stunning autumn photographs, so get up early to photograph the ‘Golden Light’.

The Golden bench
Bridge on River Thames

Move closer to concentrate on detail:

Instead of just photographing wider landscapes, create a much stronger composition by moving closer to the subject. Focus all the attention on a single subject, such as dew drops on leaves, spider webs, leaves, berries, long shadows, etc.

Rain drop on leave

Dried leave

Grass


Visit the local park or the woodlands:

Take photographs at a local park or the woodlands.


Photograph wildlife:

Photograph horses in a field or wildlife in your garden. Feed the birds - putting food and water out will encourage birds in your garden so you don’t have to travel far to photograph the wildlife.


Use backlighting:

Position the sun behind a tree trunk or branches to capture the vibrant colours of the leaves, long shadows and silhouettes


Photograph the autumn mist:

Man in the mist

To capture mist, it is necessary to get up at dawn before sunrise or wait till it is just about to set. Rivers, lakes and open fields are the most likely locations to have mist. Exposures can be tricky, set the exposure at +1 stop to prevent the mist or fog being recorded as dull murky grey.


Here is a small list of locations where you can take autumn photographs:
Local Parks,
Woodland walks near you.


New Forest - for both autumn colours and wildlife

Kew Gardens – autumn colours

Wakehurst Place – autumn colours

Westonbrit Arboretum (Tetbury, Gloucester, GL8 8QS) – autumn colours

Richmond Park (not far from Kew Gardens) – autumn colours and wildlife (herds of deer) 

Bhupinder Ghatahora