The three most common modes which
are often available on most advanced cameras are, Programme (fully automatic),
Manual and Semi-Automatic modes (Shutter and Aperture control). Recent digital
compact camera include these modes and several other scene selection modes,
which are specifically designed for the subject being photographed, such as
fireworks, beach, snow, parties, nightlife, etc.
The function of these modes is to
create accurate and correctly exposed images. These modes are useful shortcuts
for the novice photographer who may lack the full understanding on how to use
Manual and Semi-Automatic modes. When a ‘scene’ mode is selected, the camera adjusts
the aperture, shutter speed and ISO to calculate the right exposure. Selecting
‘scene’ mode often limits the user from making adjustments to the flash, white
balance, ISO and other criteria as the camera adjusts these according to the
subject.
When the correct ‘scene’ mode is
selected to fit the subject being photographed, the results are often to
acceptable standards, giving a balanced photograph.
Advanced photographers often use
the Manual or Semi-Automatic modes because they provide better control on the
final image. The photographer would envisage the image he or she would like to
be created, and then adjust the camera settings accordingly.
Below is a brief summary of some
of the common camera modes and examples of images taken using these modes.
(All the following photographs have been taken using a DSLR, but the same theory can be applied to any 'Point & Shoot' cameras.)
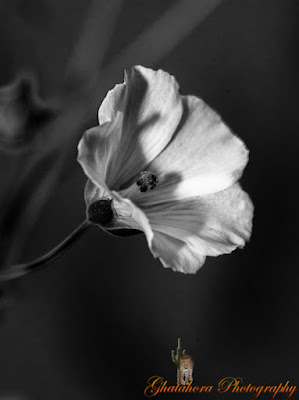
The flower symbol stands for Close-up
or Macro which means taking
photographs of subjects really close. Use this mode to photograph close-ups of
flowers, jewellery, insects, dew drops, abstract patterns, etc. In this mode
the built-in flash may be disabled to prevent an overexposed image, as your
camera is really close to the subject.
The person & star symbol stands for Night Portrait or Night Photography.
This mode uses a combination of flash and long exposure to pick the ambient
(available) light in the background. Use this mode to take pictures of persons
in low-light conditions. The use of a tripod is often recommended.
The face symbol stands for Portrait mode.
The camera selects the widest aperture setting
to minimise depth-of-field in
order to blur the background. Always remember to focus on your subject’s eyes
for sharper portraits. In this setting, the flash will automatically activate
the ‘red-eye’ reduction setting.
The mountain & cloud symbol stands for Landscape
mode. Using this mode your camera will select the smallest aperture to
maximise depth-of-field. Your image will be sharp both in the foreground and in
the background. As the name suggests, use this mode to take landscape
photographs.
The running person symbol stands for Sports mode, which is all about speed. Your camera will
automatically choose the fastest shutter speed to capture the fast moving
subject. In some cameras, the camera will enable continuous high-speed
shooting; which means it will take photographs one after another continually. Use
this mode to capture fast moving subjects or any kind of sport.
The 'A' symbol stands for Aperture
mode (semi-automatic). In this mode
you select your desired aperture and the camera will set the shutter speed to
match the aperture settings. For example, if you change your aperture from f5.6
to f11, the camera will adjust the shutter speed automatically keeping the
exposure the same. Use this mode to have more control on the depth-of -field.
The 'TV' or 'S' symbol stands for Shutter
mode (semi-automatic). In this mode
you select the shutter speed, and the camera will set the aperture accordingly.
For example, if you change the shutter speed from 1/30 (slow) to 1/250 (fast)
of a second, the aperture will change automatically. This will leave the
exposure the same as the camera is matching your shutter settings. The shutter
mode is used to capture movement or create a blur. I use shutter mode to
photograph movement in water, trailing traffic lights or to freeze the action.
The 'M' symbol stands for Manual mode
(fully manual). In this mode you have full control of your camera. You
decide what aperture and shutter speed to use in order take a correctly exposed
image. In this mode you can also override any of the camera settings, i.e.
flash, ISO, exposure compensation and white balance. Choose this mode if you
are fully confident about how the aperture and shutter work together to produce
a correctly exposed image. I use this mode mostly for landscape, close-up portraits, snow
and night photography, and even just experimenting with different exposures.
I hope this brief insight into
camera mode assists you in taking better photographs.
Bhupinder Ghatahora
Ghatahora Photography
info@ghatahora.co.uk
Facebook


