Thursday 2 April 2015

Landscape Photography part 2


Landscape Photography part 1 can be found on the below link. 

http://ghatahoraphotography.blogspot.co.uk/2012/08/landscape-photography.html


Landscape photography Part 2

7) Include the Sky

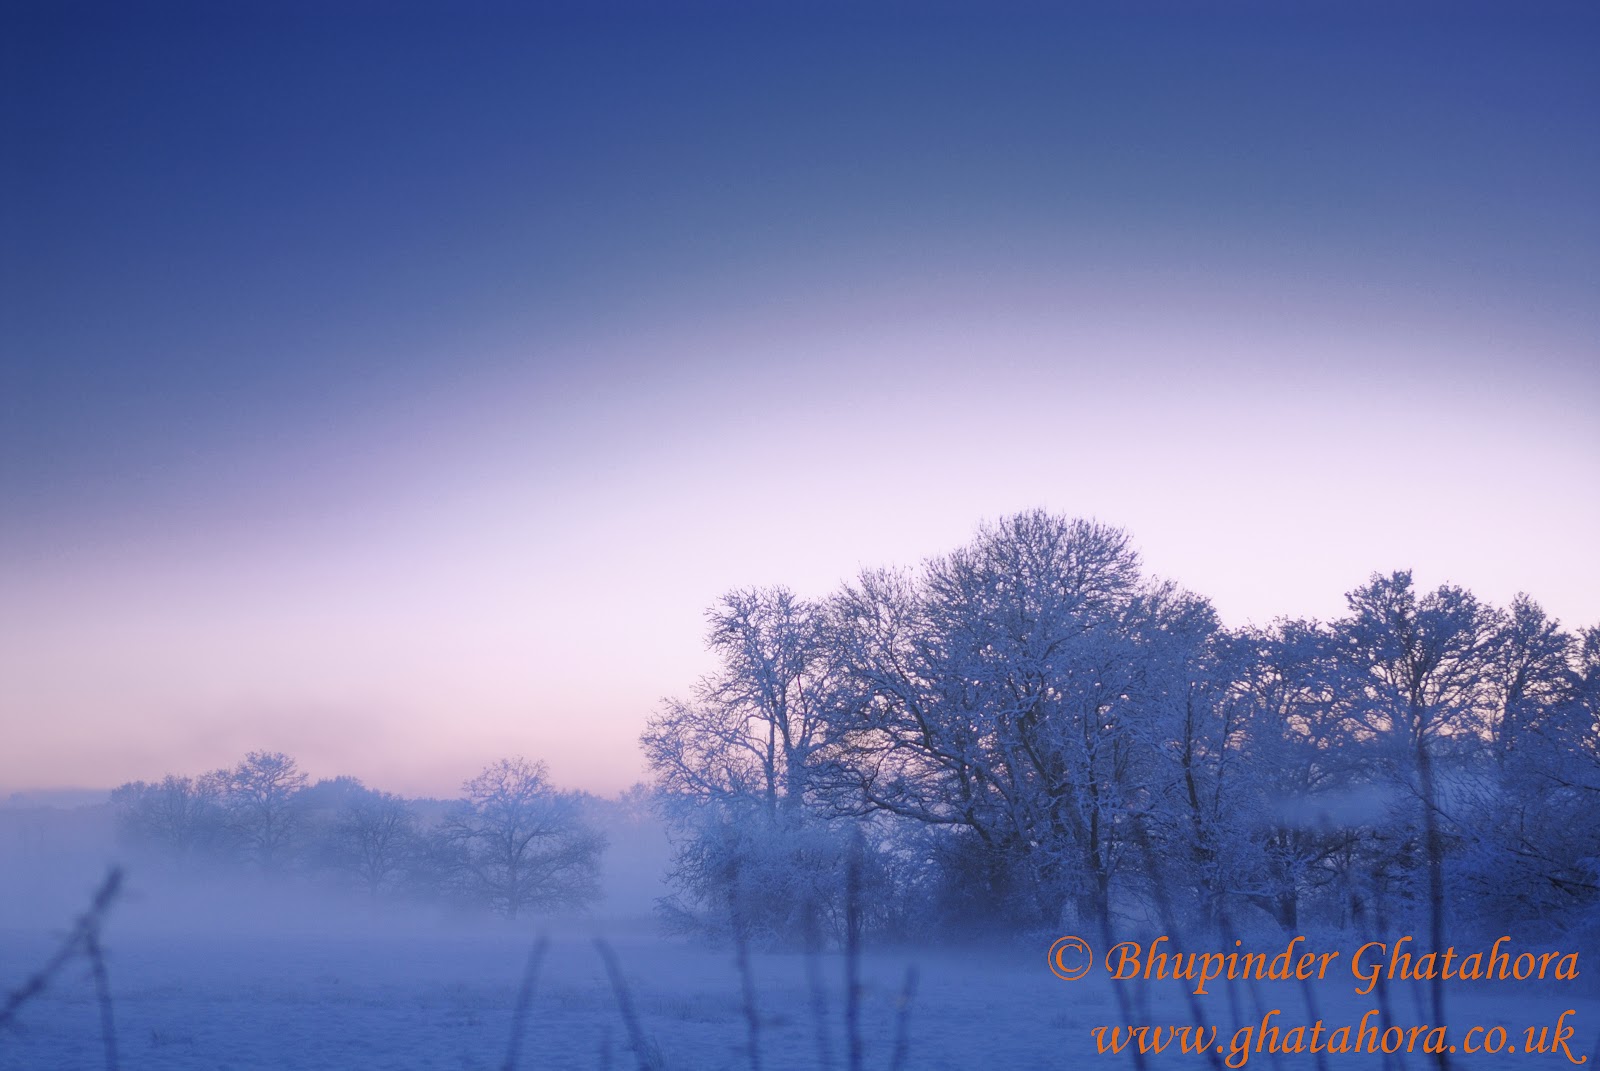
Including the sky makes the photograph more interesting. Most landscapes images will have either a dominant foreground or sky. If you your image does not have one or the other, photograph can end up being boring. If the sky is bland, boring sky, overcast, do not include the sky in your image and place the horizon in the upper third of your shot. However your foreground has to interesting. On the other hand if the sky is filled lots of clouds and colours include it by placing the horizon lower third.


Clouds - horizon on lower third


Sunrise over Loach Lomond -  horizon on upper third


8)     Leading Lines

You may have asked yourself this question, ‘how can lead the viewer’s eye of into the image’?
Here is the answer; there are a number of ways of doing this.
  • Include foreground
  •  Blur the image to create a sense of movement
  • Changing your view point
  • Colours in the landscape: i.e. a field of poppies against the blue sky
Leading lines are one of the best ways into an image which lead the viewers into the photograph. Lines give an image depth, scale and can be a point of interest and create patterns in your image.

Below: Photograph taken at Lake Windmere, Lake District


The image below was taken by pointing the camera up at the top


9)     Capturing Movement


When most people think about landscapes they think of calm, peaceful and passive environments – however landscapes are rarely completely still and adding the movement creates the mood, drama, and create a point of interest.
Examples of movement in landscapes are:– moving trees, waves on a beach, water flowing over a waterfall, birds flying overhead, moving clouds, stars etc.

Capturing movement generally means a longer shutter speed, which means more light hitting your camera  sensor. For this reason you will need to use a small Aperture, use a Neutral Density or a Polarization filter or photograph your landscapes at the start or end of the day when there is less light.


Below: Zoomed while taking the photograph


Below: Waves, a faster shutter speed used to freeze the movement of the waves

Below: a close-up of a small waterfall by the road in Scotland. A slow shutter speed used to blur the movement of the water.


10)  Weather

A landscape can change dramatically depending on the weather conditions; choose the right time to photograph.

It’s great to get out on sunny days and photograph landscapes; however an overcast day that is threatening to rain may provide you with a much better opportunity to create an image with great atmosphere and mood.

Look out for storm clouds, mist, sun shining through dark skies, sunsets, sunrises etc. and work with the different elements rather than just waiting for the next clear blue sky day.

Sunrise over Loch Lomond


After the storm - Speia toned photograph of the beach after it had stopped raining

I hope this brief insight into Landscape Photography assists you in taking better Landscape photographs.

Bhupinder Ghatahora
Ghatahora Photography
https://twitter.com/Ghatahora


Wednesday 1 April 2015

Limited Edition - 01.04.2015

Follow/subscribe to see Limited edition prints - 01.04.2015

Limited Edition Print - Buy for only £40

Unframed 16"x 12" print can also be supplied professionally framed at an addition cost.


'Buy Image'  

Bhupinder Ghatahora
Ghatahora Photography
https://twitter.com/Ghatahora
https://www.facebook.com/GhatahoraPhotography

Landscape Photography


Landscape Photography Part 1

This is a two part article on Landscape Photography.

Good landscape photography is not just achievable by high end cameras such as SLRs, but very good quality photos can also be taken with a standard compact camera. The key point here is that it is not the equipment that makes the photograph, it is the photographer.

Compact cameras often do not have interchangeable lenses like SLRs, but the Landscape mode and zoom facility on most compact cameras will allow you to take landscape photographs.

Most compact camera should enable you to have some control over the aperture, shutter speed, the ISO, exposure compensation (+/-) and  focusing. Some compact cameras will also allow the user to take full control over the focusing using the ‘manual’ mode.

Taking photographs of landscapes is fairly easy if you keep the following few tips in mind. These tips can be applied to both point & shoot compact cameras and SLR’s.


1) Maximize Depth-of-Field

In landscape photography, Depth-of-Field plays an important role: the normal rule is to make sure that the fore and background of the scene is in focus as much as possible, which is often known as maximising the depth-of-field. However, there will be times when you will want to be creative and experiment with ‘shallow’ depth-of-field in your landscape photography. 

Keep in mind that when using smaller apertures (i.e. f11, f22, etc.) less light is hitting the image sensor/film, you may have to compensate by increasing the ISO or adjusting the shutter speed, in some cases you may have to change both.

Some lower specification compact cameras may not have the facility to allow you to change any of the settings; in this case it is best to use the Landscape mode. 

The photograph below is taken using a compact camera set on Landscape mode:


The photograph below is taken using a DSLR set on Aperture mode:


2) Use a Tripod

As you may be using longer shutter speed, a tripod is recommended which will minimise any camera shake

3) Include a Focal Point

All images need to have ‘point’ where the viewer’s attention is drawn into the photograph. Without the focal point, landscape photographs will look empty leaving your viewer’s eye wondering through the image without having the desired impact of the landscape.
Here are some examples of Focal points in landscapes and these can range from a building, structure, a tree, a boulder or rocks, a silhouette, etc. Using the ‘rule of thirds’ can be very useful here.


Place your points of interest on the either one of the green dots. Most cameras have the above grid; use the grid to frame your shot.


4) Include Foregrounds

Most landscapes images work well with a foreground; always think carefully about the foreground of your images and by placing points of interest in them. By including this element you give your viewer a way of looking into the image as well as creating a sense of depth in the photograph.


5) Change your View Point

It is always best to take a little more time with your photography, especially in finding the most interesting view. Look around and find a different spot to shoot from than the one just in front of you: take a walk down paths, look for new angles, this means getting down lower to the ground, finding a higher up vantage point to photograph from. Explore your scene and experiment with different viewpoints and you will find something magical.


6) Look out for Horizons

It’s best that before you take a landscape photograph always look at the horizon on two points:

a)      Is the horizon straight? It is easier to have your horizon straight in the camera viewfinder before pressing the shutter release, saving time to straighten the image later in editing softwares.

      b)     Where to place the horizon? The ‘correct’ natural spot for a horizon is on either the top third line or the bottom line of the ‘rule of thirds’, rather than completely in the middle. In saying this, rules can be broken if you are completely sure that your image with the horizon is very striking.

(See diagram below for where to place the horizon)


I hope this brief insight into Landscape Photography assists you in taking better Landscape photographs.


Tuesday 31 March 2015

High Street Photography


Taking photographs of the High Street is one of my favourite subjects, simply because its fun and easy to capture the mood.

Here are a few points to keep in mind when taking the photographs:

  1. The right camera settings on both SLRs and Compact Cameras
  2. If allowed, use a tripod. Keep in mind that many places will not allow the use of tripods.
  3. Plan where to take the High Street photographs.
  4. Time - is it a day time shot, or a night shot. 
  5. Think about composition, how to include people in the photograph, leading lines, colour, close-ups etc
  6. Exposure - if taking photographs at night, it's always best to over and under expose the shot by 0.3. (use this as a guide only, adjust according to your image) Every camera will have a '-+' symbol.
  7. Final finished image — before I take any photographs, I always think about how I want the final finished image to look. If it's going to be in colour, sepia, b/w or do I need to add noise/gain in the final image to create the mood and atmosphere.
Settings for Compact Cameras

Day-Time
Use 'Landscape' Mode (it will give you the maximum depth of field)

Night-Time
Use 'Sunset', 'Fireworks', 'Night' Modes (every camera is different, please check your camera manual to see which mode gives a slow shutter speed. Use these as a guidance only)


Set SLR cameras on either Aperture Mode or Shutter Mode.

Here are some photographs of High Street Photography

1. This photograph was taken on fully 'Manual' using a tripod. Using a slow shutter speed has created movement of the people walking around in the frame. Photograph taken in Singapore, Sentosa Island.


2. Image taken on 'Manual' mode - Sentosa Island, Singapore


3. Photograph outside a shopping mall in Bangkok, local people offering flowers and fruits at the temples made outside the malls.


4. Bangkok - people praying outside the shopping mall


5. Lunch time rush hour in Singapore


6. Tall buildings - Singapore


7. Olympic torch relay - Basingstoke 2012 (below image was taken with a compact camera)


8. Newquay, Cornwall High Street - the image below was taken using a compact camera, which was set on 'Night' Mode. The image had a slight camera shake, so I have added extra noise at post production, simply because I was using the camera without a tripod. The colour of the image has also be changed in post production.


9. Take close-ups of structures on the High Street. (close-up photograph of the shadow)


10. Clock tower outside Sainsbury's


Hope this articles assists you in taking better and interesting photographs of the High Street. A High Street could be anywhere!


Bhupinder Ghatahora
Ghatahora Photography
info@ghatahora.co.uk
Facebook

Monday 30 March 2015

Nightscapes

I will briefly explain the techniques on how to photograph cities, towns, illuminated signs and traffic trails in low light. Night photography is simple, fun and creative, especially at this time of the year as you don’t have to wait long for nightfall.

It is always best to photograph cities, towns and traffic trailing lights when there are still some shades of dark blues, purples, pinks and orange in the sky. The final photograph becomes more interesting with lots of colours rather than a darkened sky in the background. When photographing illuminated signs, it is advisable to shoot them in close-up, therefore the background may not be an issue.

A few points to keep in mind:

Camera settings: Use Aperture Priority mode or Manual mode on cameras. Cameras which do not have the Aperture Priority or Manual mode will often allow selecting different scene settings, such as ‘dusk/dawn’, ‘nightlight’ or ‘sunset’ modes. Please choose which suits you and your camera best.

When using the Aperture Priority mode, set the aperture at f16 (the camera will automatically adjust the shutter speed).

For Manual mode, set the aperture at f11or f16 and the shutter speed at 15 seconds. Use this shutter speed as a guide only, as your exposure time may vary depending on the available light. You may either have to increase or decrease the shutter speed depending on the image produced.

If you are using a SLR, there is normally an exposure indicator visible through the viewfinder which looks like -2||||1||||0||||1||||2+. Adjust the shutter speed whilst looking through the viewfinder and ensure the indicator is on 0, as this will give you the correct exposure.

On compact cameras choose ‘Nightlight’, and the camera will adjust aperture and shutter speed accordingly.

Exposure: due to low light, exposures will be long ranging from 10 seconds to 90 seconds. Use a tripod to avoid camera shake, or alternatively change the ISO on your camera to 800 or higher to minimise camera shake.

Composition: It is advisable to frame your shot before you press the shutter release as it avoids ‘unwanted’ objects in your photograph.

Equipment: camera, tripod, watch or a stopwatch to time exposures.

Bracketing: as we will be using a small aperture (f11/f16), it is advisable to over and under expose your image by ½ a stop. When using bracketing, you will have a selection of images with varying degree of exposure. This will allow you to select the desired exposure by duplicating the settings of your preferred image.

Warm clothing: coat, gloves, hat and umbrella.


I have used my SLR and compact camera to take the following photographs. When I used the SLR, I set the camera on fully manual mode mounted on a tripod. As for my compact camera, I used the ‘night landscape’ mode without using a tripod or flash (the camera needed to be handheld very steadily). 


Examples of photographs taken using a compact camera set on ‘night landscape’:


Examples of photographs taken using a SLR set on manual mode:

The face in this image was created by laser lights:


Outside a restaurant:


Illuminated huts near the waterfront:


Bhupinder Ghatahora
Ghatahora Photography
https://twitter.com/Ghatahora